
Table of Contents
Stripe has emerged as a go-to solution for businesses seeking to accept online payments easily and securely. With its robust API and developer-friendly approach, integrating Stripe into web applications has become increasingly popular.
In this article, we’ll explore how to integrate Stripe into a React application, leveraging its power to streamline payment processing.
Getting Started with Stripe Integration in React
Setting Up a Stripe Account and Installing Dependencies
Setting Up a Stripe Account
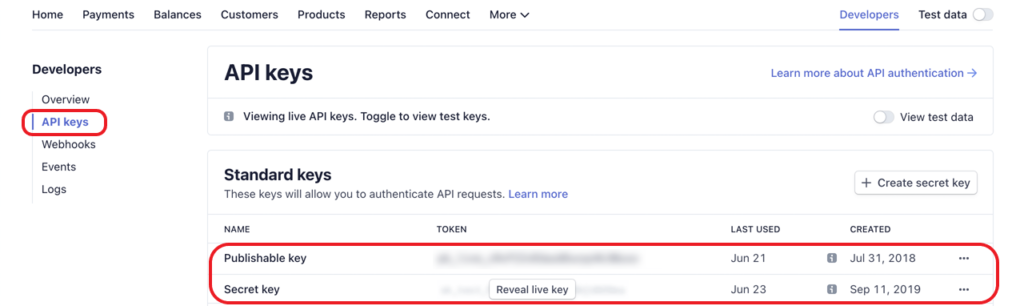
Before diving into integration, you’ll need to create a Stripe account. Head over to the Stripe website, sign up, and obtain your API keys, which will be used to authenticate requests from your React application.
Installing Stripe Dependencies in React
To integrate Stripe into your React project, install the necessary dependencies using npm or yarn. The @stripe/react-stripe-js package provides components and hooks for working with Stripe Elements seamlessly within a React application.
npm install @stripe/react-stripe-js @stripe/stripe-js
Methods for Stripe Integration in React
Creating a Payment Form Component
Utilizing React Components for Form Creation
In React, components are the building blocks of UI. Create a PaymentForm component to encapsulate the payment form logic, making it reusable across your application.
import React, { useState } from 'react';

const PaymentForm = () => {
    const [formData, setFormData] = useState({
        cardNumber: '',
        expDate: '',
        cvc: ''
    });

    const handleChange = (e) => {
        setFormData({
            ...formData,
            [e.target.name]: e.target.value
        });
    };

    const handleSubmit = (e) => {
        e.preventDefault();
        // Handle form submission and payment processing
    };

    return (
        <form onSubmit={handleSubmit}>
            <label>
                Card Number:
                <input type="text" name="cardNumber" value={formData.cardNumber} onChange={handleChange} />
            </label>
            <label>
                Expiration Date:
                <input type="text" name="expDate" value={formData.expDate} onChange={handleChange} />
            </label>
            <label>
                CVC:
                <input type="text" name="cvc" value={formData.cvc} onChange={handleChange} />
            </label>
            <button type="submit">Submit Payment</button>
        </form>
    );
};

export default PaymentForm;;
Handling Form Input and Validation
Implement input fields for capturing payment details such as card number, expiration date, and CVC—Leverage React’s state management to handle form validation and user input effectively.
Integrating Stripe Elements
Stripe Elements are pre-built UI components provided by Stripe for securely collecting sensitive payment information. These components are customizable and ensure PCI compliance without compromising user experience.
Adding Card Element to the Payment Form
Integrate the Card Element provided by Stripe into your PaymentForm component. This component simplifies securely collecting credit card information while maintaining a seamless user experience.
import { CardElement } from '@stripe/react-stripe-js';

const PaymentForm = () => {
    const handleSubmit = async (event) => {
        event.preventDefault();
        // Handle form submission and payment processing
    };

    return (
        <form onSubmit={handleSubmit}>
            <label>
                Card details
                <CardElement options={CARD_ELEMENT_OPTIONS} />
            </label>
            <button type="submit" disabled={!stripe}>
                Pay
            </button>
        </form>
    );
};

export default PaymentForm;
Client-side Tokenization
Implementing Client-side Tokenization with Stripe
Tokenization involves converting sensitive data into a unique token that can be safely transmitted over the internet. Integrate Stripe’s client-side tokenization to tokenize payment details securely before sending them to your server.
const handleSubmit = async (event) => {
    event.preventDefault();
    const { token, error } = await stripe.createToken(cardElement);

    if (error) {
        console.error('Error:', error);
    } else {
        console.log('Token:', token);
        // Send token to your server for further processing
    }
};
Server-side Integration
Setting Up Server-side Code
Create server-side endpoints to handle payment processing using Stripe’s API. These endpoints will receive the tokenized payment information from the client and initiate the payment transaction with Stripe.
const stripe = require('stripe')('YOUR_STRIPE_SECRET_KEY');

app.post('/charge', async (req, res) => {
    try {
        const { amount, token } = req.body;
        const charge = await stripe.charges.create({
            amount,
            currency: 'usd',
            source: token.id,
            description: 'Payment for React Integration'
        });
        res.json({ success: true, charge });
    } catch (error) {
        console.error(error);
        res.json({ success: false, error: error.message });
    }
});
Processing Payments with Stripe API
To process payments with the Stripe API, you’ll need to interact with Stripe’s server-side SDK. Here’s a basic example of how you can handle payments on your server using Node.js and Express:
Install Stripe Node.js Package:
First, you need to install the Stripe Node.js package using npm or yarn.
npm install stripe
Initialize Stripe:
In your server-side code, initialize Stripe with your secret API key.
const stripe = require('stripe')('YOUR_STRIPE_SECRET_KEY');
Create Payment Intent:
When a user initiates a payment, create a Payment Intent on your server.
app.post('/create-payment-intent', async (req, res) => {
    try {
        const { amount, currency } = req.body;
        const paymentIntent = await stripe.paymentIntents.create({
            amount,
            currency,
        });
        res.send({ clientSecret: paymentIntent.client_secret });
    } catch (error) {
        console.error('Error creating payment intent:', error);
        res.status(500).send({ error: 'Failed to create payment intent' });
    }
});
Client-side Integration:
On the client side, retrieve the client secret generated by the server and use it to confirm the payment.
import { loadStripe } from '@stripe/stripe-js';

const stripePromise = loadStripe('YOUR_PUBLISHABLE_KEY');

const handlePayment = async (amount) => {
    const response = await fetch('/create-payment-intent', {
        method: 'POST',
        headers: {
            'Content-Type': 'application/json',
        },
        body: JSON.stringify({ amount }),
    });
    const { clientSecret } = await response.json();

    const stripe = await stripePromise;
    const { error } = await stripe.confirmCardPayment(clientSecret, {
        payment_method: {
            card: cardElement,
        },
    });

    if (error) {
        console.error('Payment failed:', error);
    } else {
        console.log('Payment successful!');
    }
};
Handle Payment Outcome:
Finally, handle the outcome of the payment on the client side based on the response from Stripe.
const handleSubmitPayment = async () => {
    try {
        await handlePayment(amount); // Call the handlePayment function passing the amount
        // Handle success
    } catch (error) {
        console.error('Payment failed:', error);
        // Handle failure
    }
};
This code demonstrates the basic process of integrating your React application with the Stripe API to process payments securely. Remember to replace ‘YOUR_STRIPE_SECRET_KEY’ with your actual Stripe secret API key, and ‘YOUR_PUBLISHABLE_KEY’ with your actual Stripe publishable API key. Additionally, ensure proper error handling and validation in your application.
Testing and Debugging
Using Stripe Test Cards
During development, utilize Stripe’s test environment and test cards to simulate different payment scenarios and ensure that your integration functions correctly under various conditions.
Debugging Common Issues
Debugging is an essential part of the integration process. Familiarize yourself with common issues such as authentication errors, validation failures, and network issues, and troubleshoot them effectively.
Handling Payment Events
Managing Successful Payments
Upon successful payment processing, update the UI to reflect the transaction’s status and provide the user with a confirmation message. Consider sending email receipts for completed transactions to enhance the user experience.
Handling Failed Payments
In the event of a failed payment, notify the user of the error and prompt them to retry or use an alternative payment method. Provide clear error messages to help users understand the reason for the failure.
Implementing Webhooks for Advanced Functionality
Setting Up Webhooks in Stripe
Webhooks allow your application to receive real-time notifications about events that occur in your Stripe account. Set up webhook endpoints to handle events such as successful payments, failed payments, and subscription changes.
Handling Webhook Events in React
Create server-side logic to process webhook events received from Stripe. Update your application’s state or trigger additional actions based on the events received, ensuring a seamless payment experience for your users.
Enhancing User Experience
Adding Loading Spinners and Error Messages
Incorporate loading spinners to indicate when payment processing is underway, providing visual feedback to the user. Display informative error messages in case of payment failures or other issues, guiding the user through the resolution process.
Optimizing UI for Mobile Devices
With the increasing use of mobile devices for online transactions, it’s crucial to optimize your payment form and UI for smaller screens. Ensure that your application remains responsive and user-friendly across various devices and screen sizes.
Security Considerations
SSL Requirements
Maintain a secure connection between your React application and the server by enforcing SSL/TLS encryption. This ensures that sensitive payment information is transmitted securely over the internet, reducing the risk of data breaches.
PCI Compliance
Adhere to Payment Card Industry Data Security Standard (PCI DSS) requirements to protect cardholder data and maintain compliance with industry regulations. Stripe handles much of the PCI compliance burden, but it’s essential to understand your responsibilities as a developer.
Integrating Stripe with React – FAQ
Yes, Stripe provides client-only solutions like Stripe Checkout and Stripe Elements, allowing you to accept payments without a backend. These solutions handle payment processing securely without the need for server-side code.
Yes, creating a Stripe account is free. However, Stripe charges transaction fees for successful payments processed through its platform.
Stripe Checkout provides a pre-built, hosted payment page, while Stripe Elements offers customizable UI components for securely collecting payment details on your website.
Yes, Stripe’s client-side tokenization ensures that sensitive payment information is securely tokenized before being sent to Stripe’s servers, minimizing security risks.
While client-only integrations offer simplicity, they may have limitations in terms of customization and advanced functionality compared to full backend integrations.
